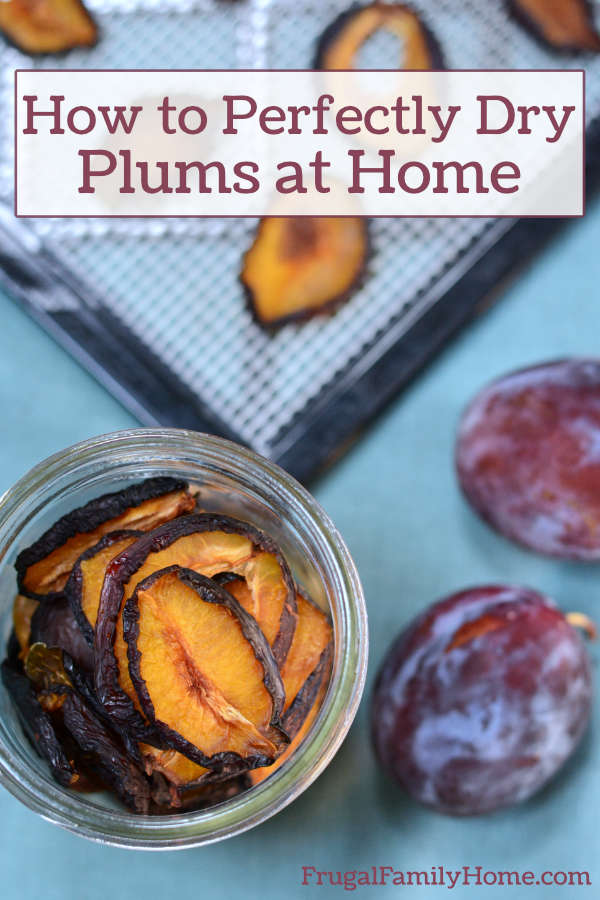
How to Dry Plums in 5 Easy Steps
Do you dry fruit? I have to admit I love to dry fruit to snack on later. Why? Because I’m a bit lazy and it’s so darn easy to do. In this food tutorial, I’m sharing how to dry plums. It’s easy to do, I promise.
My aunt has a plum tree that produces lots of yummy plums each year. We go over and help her pick them. We get fresh juicy plums that are oh so good.
And when we can’t eat them all, we share some with neighbors and family. The rest goes into the dehydrator to make dehydrated plums.
Drying Plums
I think dry plums get a bum rap. They are so good but hey when you dry them magically they are called prunes. Yes, not a great name. Makes you think of something old and withered up, doesn’t it?
And it doesn’t really sound that appealing. I mean what would you rather eat a prune or a dried plum? I pick dried plum.
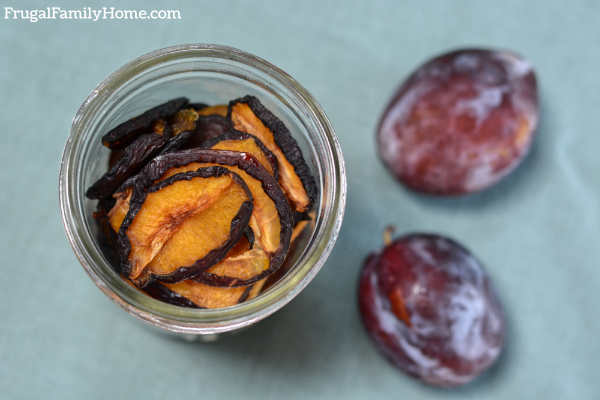
These dried plums aren’t like the squishy sticky dried plums from the store. No, they are sweet and chewy. So very good.
Even though I dry pounds and pounds of plums each year, we go through them so fast. I mean you can’t just eat one. So you’ll want to dry a bunch when you make them.
Right now plums are coming into season so it’s time to get some from the farmers’ market or the store and get them dried for the winter.
How to Dry Plums
Plums are easy to dry with only a few steps to get from fresh plums off the tree to sweet and chewy dried plum perfection. The directions below will take you through each step.

Some of the links below are my referral links. Which means as an Amazon Associate I earn from qualifying purchases and when you purchase through them I can make a little money at no extra cost to you. Thanks! See my disclosure policy for more information.
What You’ll Need to Dry Plums
Plums, we like the plums that are called Italian Prunes, but any plums will work
Paring Knife, we like these they are great for so many kitchen jobs
Dehydrator or Oven, I love my dehydrator but if you don’t have one you can dehydrate plums in your oven.
That’s it just three items and a little time and you can have dried plums you made yourself.
1. Wash the Plums
Wash the plums before you dry them. Take a large bowl and fill it with water. Then put your plums in the water. Swish them around a bit. Then rub the plums as you take them out.
Finally, rinse them under running water to remove any debris that is left. The plum skin should feel nice and smooth.
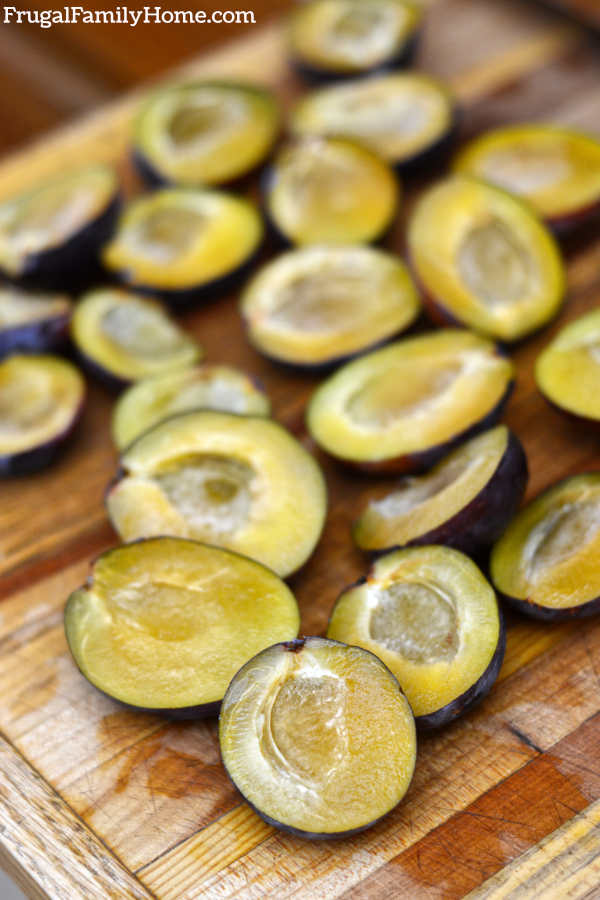
2. Pit the Plums
Take your washed plum in your hand and cut around the plum, down to the pit to cut it in half. Gently twist or pull the plum apart and remove the pit. If you have fairly ripe plums, the pit should be easy to remove.
3. Slice or Cut into Quarters (if desired)
The plums we have are often pretty thick so I need to slice each half once more so they fit better on the dehydrator trays.
I cut half of the plum in half again lengthwise. It makes the fruit less thick but still a nice size.
If your plums aren’t too thick, you can place the plum halves on the dehydrator trays without cutting them again.
Or if you desire, you can quarter your plums.
The main thing to remember is to try to get them about the same thickness so they will all be dry about the same time.
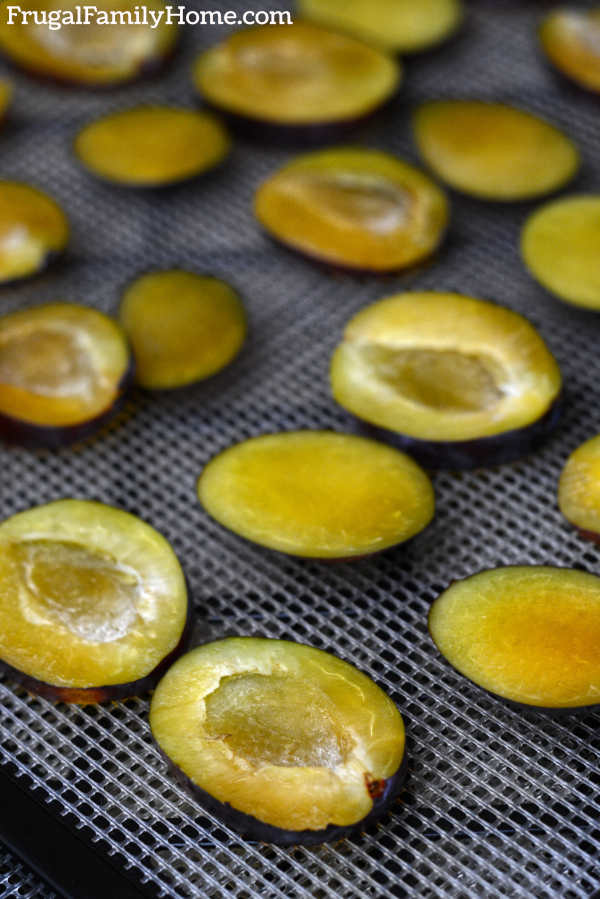
4. Place on Trays
Once you have enough plums cut to fill a dehydrator tray, arrange them onto the tray.
I put them cut side up, but you can put them cut side down. I’ve dried them both ways and haven’t noticed a difference.
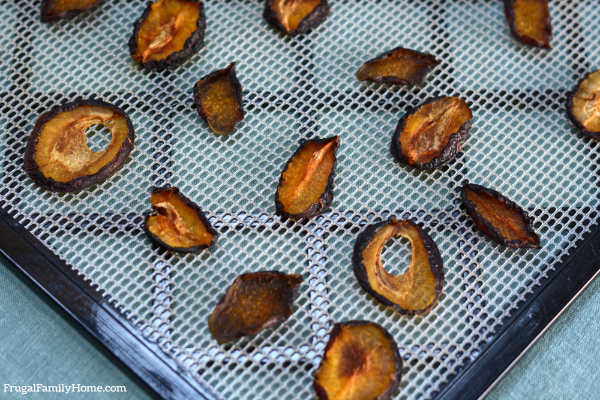
5. Dry the Plums
What temperature do you dry plums in a dehydrator?
I set my dehydrator to 135 degrees and place each tray of plums into the dehydrator as soon as they are ready. I don’t like the cut plums to sit out and get brown.
You’ll want to let your plums dry until they are fully dry but still pliable. Depending on the size it can take about 6 hours on average.
You may have some smaller plums that will be done sooner than 6 hours and some bigger plums that will take longer to dry.
You want to check to make sure the plums are dry. You don’t want them to have any moisture or moisture pockets in them so they will store well.
How do you dry plums in the oven?
If you don’t have a dehydrator, then you can dry the plums in the oven. You’ll want to place the plums in an oven at 180 degrees and let them dry for about 8 hours.
You’ll need to check after 8 hours to see if they are fully dried and don’t have any moisture left in them. Some bigger plums may need more time.
Let the Plums Cool
I’ve found my dried plums last longer and store better if I let them cool before placing them into the storage containers. Be sure to let your plums cool down first.
Storing your Dried Plums
How do you store dried plums?
We like our plums pretty dry so we store them at room temperature in the cupboard with no problems or molding.
You can store your dried plums in a heavy zipper bag, like a freezer bag. A vacuumed sealed bag, or a jar that can be tightly sealed with an oxygen packet.
If you like your plums less dry then it would be better to store them in a freezer bag, in the freezer. It will ensure your plums won’t mold.
How long can you store dried plums?
When they are properly stored dried plums easily last 6-12 months at room temperature.
But at our house they only last a few months. We are lucky to have any left after 4 months because everyone loves them so much at our house.
Here’s the printable recipe…
How to Dry Plums
Equipment
Ingredients
- Italian Prune Plums
Instructions
- Wash your plums in a bowl of water and do a final rinse.
- Cut the plums in half and remove the pit
- If your plums are thick cut them again into slices lengthwise.
- Place plums on the dehydrator tray.
- Place tray into dehydrator and dry at 135 degrees for about 6 hours or until the plums are dry and no moisture remains.
- Let the dried plums cool.
- Then pack into heavy freezer bags that can be sealed tightly or pack into jars with an oxygen pack with a tight fitting lid.
- Dried plums when properly dried can be stored up to 12 months.
Notes
Nutrition

That’s it! That’s how to dry plums at home. It’s only 5 steps from start to finish and all the steps are easy to do.
Go out and get some plums while they are in season and store some up for the winter. Well, that is, if they last that long.

Shelly, thank you so much for this. I have two mega bowls-full of plums and this seems just the right thing to do with them. I am in the UK, so forgive me if my question is a stupid one: oven temperature of 180 degrees – is that centigrade? And if a fan oven, should it be 160? Again, I apologise if this is a really dim question.
Many thanks!
Janice, this is not a stupid question. I looked up the conversion because I didn’t know it since we use fahrenheit. But you’ll want to run at 82 degrees celsius without a fan and 71 degrees with fan on. If your oven doesn’t go that low, then run it as low as possible to dry them. I hope that helps and yay you have so many yummy plums to keep.