Easy Double Thick Crochet Potholder Pattern (With Printable Pattern)
If you love handmade potholders you need to give this double thick crochet potholder pattern a try. It has an old fashioned look but it’s a little bigger and thicker too.
We all need potholders. If you bake or cook you need to have pot holders to take dishes out of the oven.
While you can purchase them, you can quickly make your own crochet potholders with the double thick crochet potholder pattern below.

Do you love the look of old fashioned potholders? I do, I had one small crochet potholder that was my grandma’s and then it became mine.
It was hand crocheted with crochet thread, and even though it was double thick it still wasn’t quite thick enough for a really hot pot. I wanted to make another hot pad that was thicker and my search began for a pattern.
I searched the internet for a pattern that was similar but I couldn’t find the right one. I decided it would be better to make my own pattern from the potholder I had.
I counted the rows, deciphered what stitches and where to use them, and came up with this double thick crochet potholder pattern.
These are quick to make, even though you need to make two of them. I was able to get one done in about an hour.
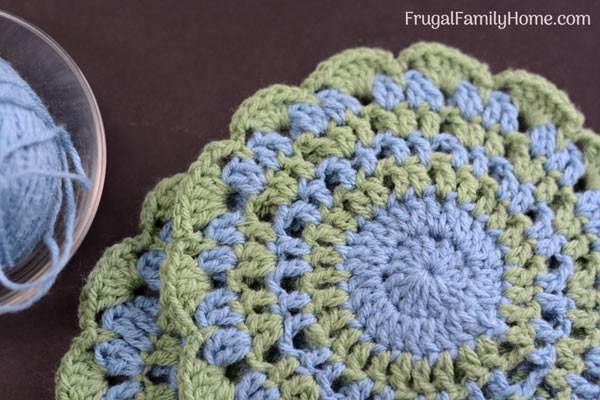
For this double thick crochet potholder pattern, I used a baby weight cotton yarn, but any thinner cotton yarn would work. I would suggest using a fingering, baby, sport or DK yarn. I’ve linked to my favorite DK yarn below, it’s a mix of cotton and linen and it’s inexpensive too.
Some of the links in this post are my referral links, just so you know. Thanks for the support.
Supplies Needed for the Crochet Hot Pad
Crochet Hook size F
DK Weight Cotton Yarn, two colors if desired
Video Instruction for Double Thick Crochet Potholder Pattern
Step by Step Double Thick Crochet Pot Holder Pattern
Start with the first color of yarn and make a slip knot to start. Chain 3 and make a circle using a slip stitch through the first change.
Round 1
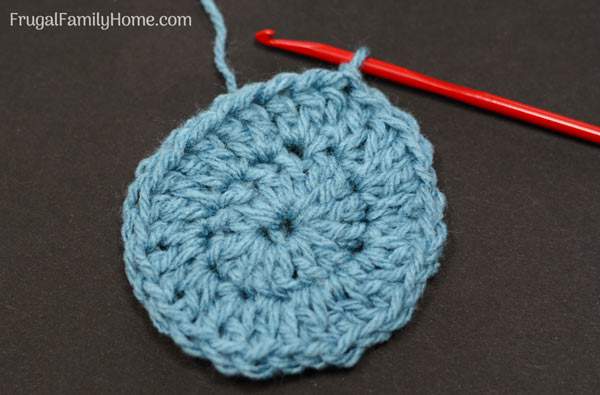
Chain three this counts as your first double crochet. In the loop double crochet 13 times. Slip stitch through the third chain at the beginning to complete the round.
Round 2
Chain three to start. Double crochet in the next double crochet. Double crochet twice in the next double crochet continue with 2 double crochet in each double crochet in round 1. Finish by with a slip stitch in the third chain.
Round 3
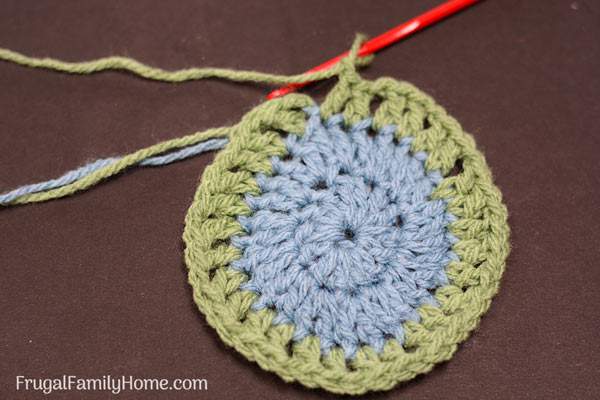
Using the second color of yarn, join and chain 3. Double crochet in the next double crochet and then chain one. *Double crochet in the next two double crochet then chain 1* repeat between the * until the round in complete. Finish the round with a slip stitch into the third chain.
Round 4
Using the first color of yarn chain 3. Double crochet in the next double crochet and then chain 1. *Double crochet in the next two double crochet stitches then chain 1* repeat between the *’s until you have completed the round. Finish the round with a slip stitch into the third chain.
Round 5
Using the second color of yarn, join and chain 3. Double crochet twice in the next double crochet and then chain one. *Double crochet in the next double crochet. In the next double crochet, double crochet twice then chain 1* repeat between the *’s until the round in complete. Finish the round with a slip stitch into the third chain.
Round 6
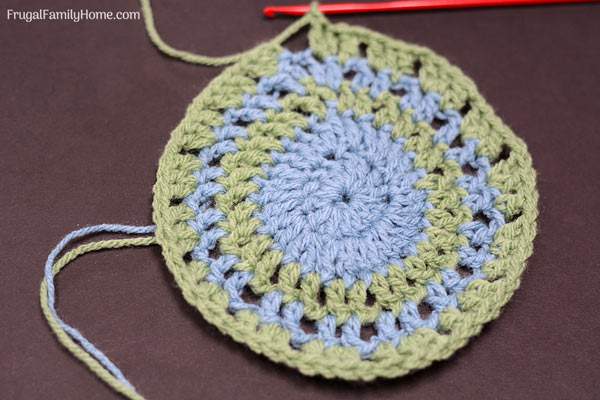
Using the first color of yarn, join and chain 3. Double crochet in the next double crochet, then double crochet twice in the next dc and then chain two. *Double crochet in the next 2 double crochet. In the next double crochet, double crochet twice then chain 2* repeat between the *’s until the round in complete. Finish the round with a slip stitch into the third chain
Tie off and make a second pot holder.
Assembling the Potholder
Once both sides of the potholder are completed, place them wrong sides together and add the edging to stitch together.
Be sure to match up the chain spaces before starting to add the edging.
Adding Edging
Take the second yarn color and in one of the chain open spaces, join and dc 5 times. Chain 2.
Between the four double crochet stitches, (between dc stitch 2 and 3), add a sc be sure to catch both sides as you go through, chain 2.
In the next open space, dc 5 times.
Repeat the pattern (5 dc in open space, chain 2, sc between the 2nd and 3rd dc, chain 2) until you are all the way around the potholder.
Tie off and weave in ends.
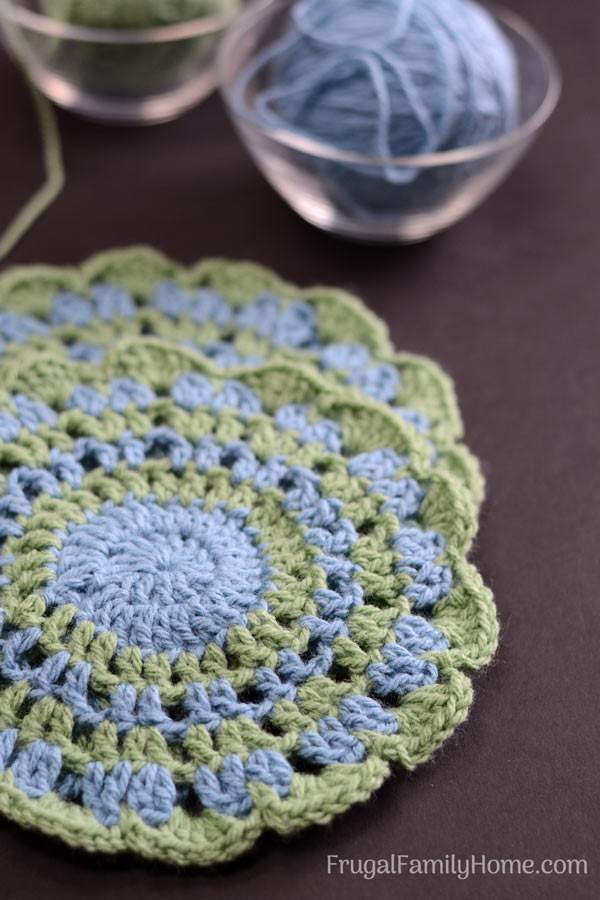
That’s it. That’s all there is to making your own double thick pot holders. If you haven’t worked in the round before, watch the video and follow along, once you get the pattern down it should go pretty fast.
Got Questions? Leave them in the comments below and I’ll do my best to answer them. Grab the printable pattern by clicking this link.
Other Easy DIY Projects to Try
Ridged Crochet Dishcloth
Textured Scarf with Cute Edging
Fingerless Gloves

I love this pattern! So pretty and useful too 🙂 You should see how awful my old potholders look…so many of them have burn marks where they got too close to a burner on the stove. I should really make myself some new ones, in colors to match my kitchen!
Erin, these are super easy to make and they would be great in colors to match your kitchen.
Nice and easy pattern
how do I make it larger
Yvette, you could add a few more rounds and that would make it bigger. I hope that helps.