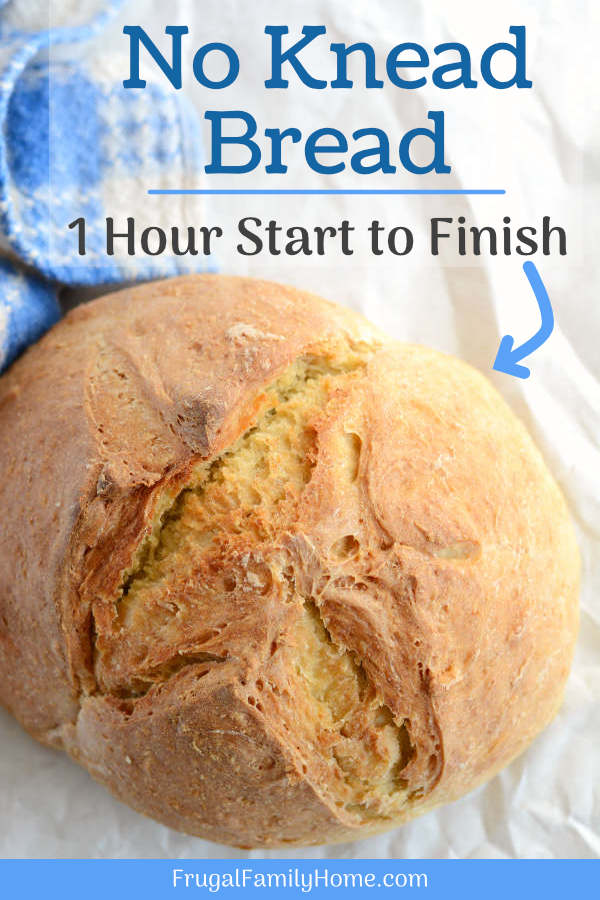
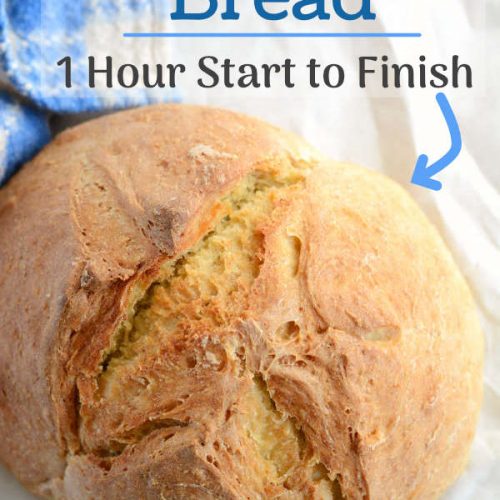
No Knead Bread, Quick and Easy, 1 Hour Recipe
You want to make your own bread from scratch, but the time involved in making it has always held you back. Well, don’t let it hold you back any longer. Oh, no this no knead bread recipe can be made in about an hour.
Yes, you read that right homemade yeast bread from start to finish in just one hour. And it’s so easy, even if you’ve never made bread before, you can make this bread.
I’ve got a video for you and step-by-step photos below.
More Great Yeast Recipes: Quick Dinner Rolls | Easy Cinnamon Rolls | Homemade French Bread
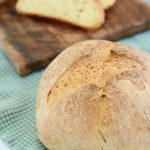
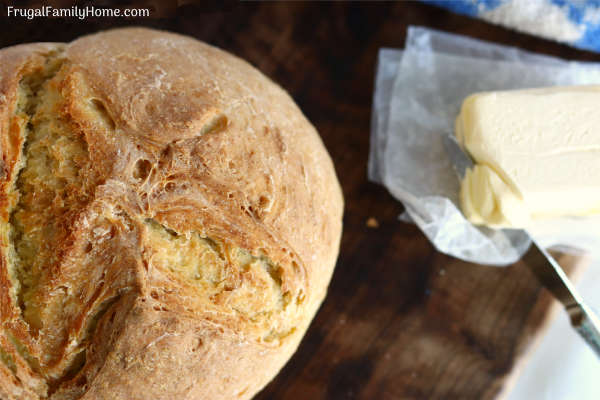
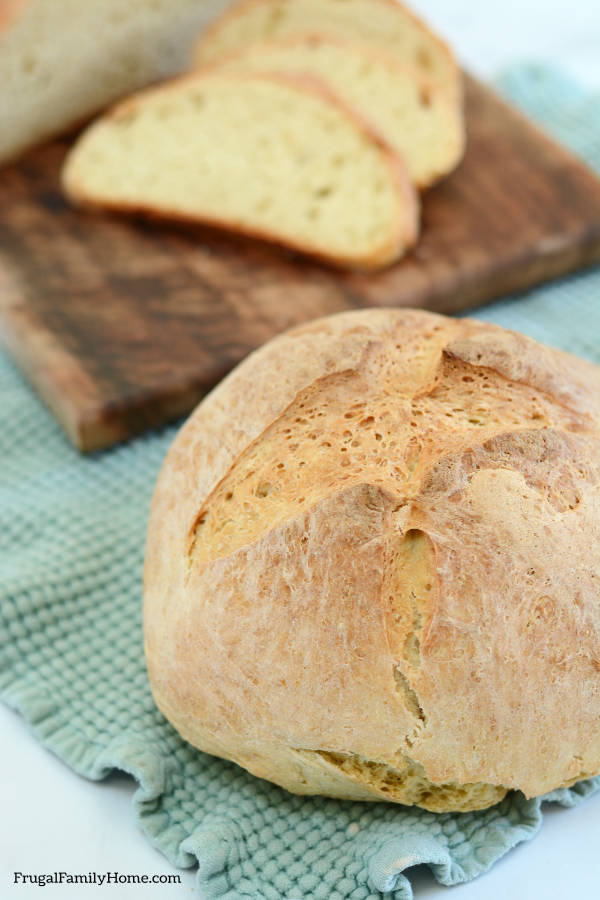
There is something about homemade bread. While it’s baking, it smells so good.
Then to take a fresh loaf out of the oven, cut a piece and add butter to it. Oh, it’s a little slice of heaven you can hold in your hands.
And if you’ve been wanting to learn how to make yeast bread, this is the perfect recipe to start with.
It’s not time consuming at all, just about an hour from bowl to belly or start to finish.
No kneading, no proofing the yeast, and only 15 minutes of rising.
This bread virtually makes itself. Only a few minutes of hands on time for you.
It’s really so easy, even if you’ve never made bread you can make this bread, yes you can!
Let’s get started! Soon your family will come to the kitchen being drawn in by the smell of your delicious homemade bread.
What You Need for this Homemade Bread Recipe
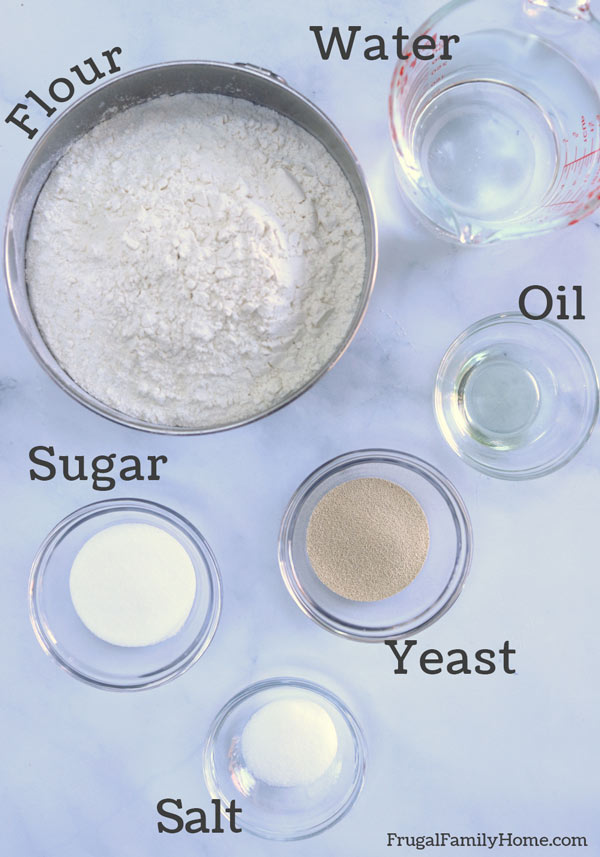
This no knead bread recipe is easy to make and simple too. Only 5 ingredients needed. You probably have all of them in your cupboard right now.
- Flour, I use unbleached flour
- Yeast, you have to have yeast
- Sugar, helps the yeast to growFlour, I use unbleached flour
- Yeast, you have to have yeast
- Salt, brings out the flavor
- Oil, a little in the bread and some to oil the bowl
Now you know what you need, let me show you how to make this homemade bread.
How to Make No-Knead Bread (Video Tutorial)
I made a quick video for you. They say a picture is worth a thousand words. Well, I say a video is like having someone right there alongside you to teach you. So it has to be about 10,000 words, wouldn’t you say?!
But if watching a video isn’t for you. I have all the steps below with photos too. Along with bread baking tips to help your bread turn out perfectly.
How to Make No Knead Bread Step-by-Step
Step 1 The Dry Ingredients
Measure your flour, sugar, salt, yeast, and place them into your food processor. And pulse a few times to mix.
Recipe Tip: the flour needed for this recipe can fluctuate. If you live in a humid area, you will need more flour (start with about 5 1/2 cups add more if needed). If you live in a dry area, it will need less flour (start with 5 cups).
Step 2 Measure Liquid Ingredients
Heat your water to warm. You want it between 120 degrees and 130 degrees. Then add your oil.
Recipe Tip: The water temperature is really important in this recipe. Since it doesn’t have much rise time, the water needs to be warm, but not so hot to kill the yeast. I use my meat thermometer to test the temperature.
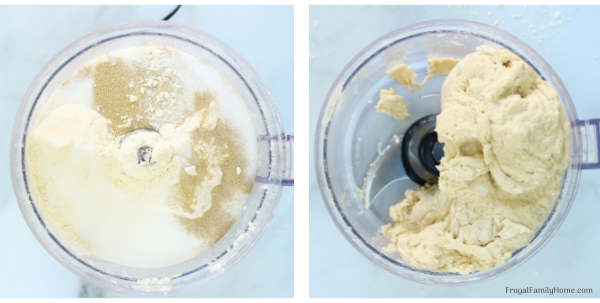
Step 3 Combine the Dry and Liquid Ingredients
With the food processor running, add the water and oil in the chute slowly. And keep it running until the dough forms a ball.
Take off the lid and feel the dough, if it’s sticky, add a couple of tablespoons of flour. If too dry, add a tablespoon or more of water.
Then pulse.
Step 4 Pulse 20 times
Now that the dough has formed a ball, you’ll want to pulse the food processor about 20 times.
And now the bread dough is ready to rise.
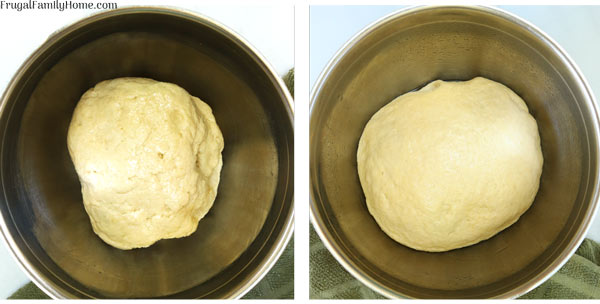
Step 5 Let Dough Rise
In a large bowl, add a drizzle of oil. Then rub it on the sides and bottom of the bowl.
Add the bread dough to the bowl, then flip a few times to coat with oil.
Cover with a towel, place in a warm area and let rise 15 minutes.
While that is rising heat, a couple of cups of water.
Step 6 Shape the Loaves
Now that the dough has risen. Cut the dough in half and form two balls. Place them on a cookie sheet and then score a deep X in the top of each one.
Place the cookie sheet in a cold oven.
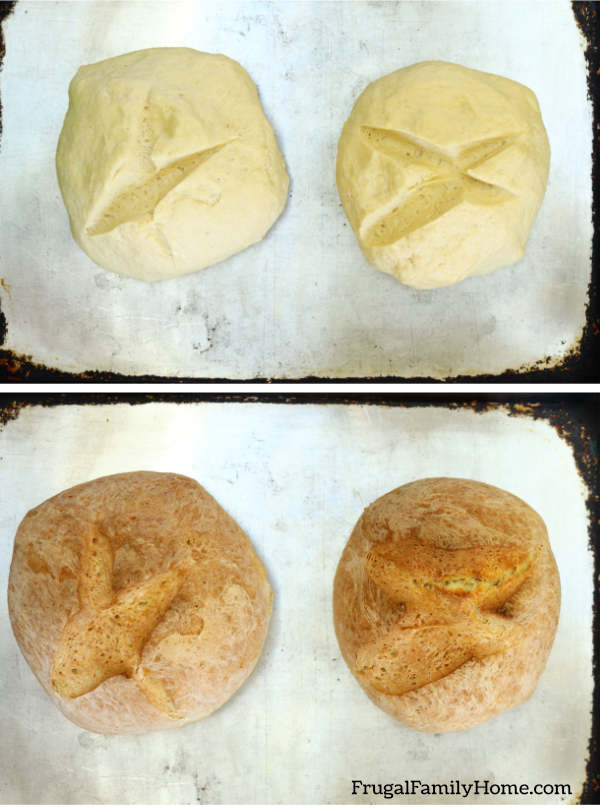
Step 7 Bake, How to Set Up the Oven
Because this is a quick no knead bread recipe, you want to add the bread to the oven when it is cold. Place the cookie sheet on the middle rack.
Then add a cake pan on the rack in the lowest position. Pour very hot water into the cake pan. Bake at 400 degrees for 40-50 minutes.
Recipe tip: the water in the pan below the bread helps to keep moisture in the oven while the bread is cooking. Starting with a cold oven gives the bread time to rise as the oven heats. Don’t preheat the oven.
Step 8 Let Cool on a Rack
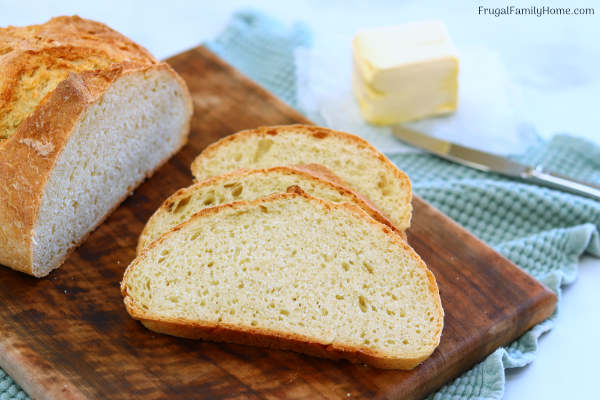
Now that you have two beautiful loaves of bread, let them cool on a rack. The crust should be crisp. If you leave them on the cookie sheet, they will sweat and the bottom will get soggy.
If you can’t resist the bread until it’s cooled. Cut a slice and smear with butter. It’s so good.
What is No Knead Bread, Why Don’t You Knead It?
You make traditional no knead bread with a long rise time too. It kneads itself. But sometimes I don’t have time to let it sit around for hours. I need bread quick.
And that’s when I use this recipe. It’s crusty on the outside and delicious and bubbly on the inside. It’s denser than traditional bread. It’s great with soup or salad when you want a heartier bread to eat or dip.
What Happens if I Knead, No Knead Bread?
It will be fine just proceed with the recipe. No harm will be done at all.
Yeast Tips…
Be sure to check the date on your yeast packages. Be sure to use it before the “Best By” date.
If you have a bulk or larger jar or package of yeast, be sure to refrigerate or freeze it in an airtight container once opened.
I buy yeast in bulk and store some in an airtight container in the refrigerator and the rest in a vacuumed sealed bag. And keep it in a cool and dry area.
Because yeast is a living organism and will lose activity. If you bake little, buy small quantities or the foil packages of yeast.
More Articles About Bread Baking: Frugal Homemade Bread | How to Make Bread Video Tutorial | How to Proof Yeast
See, that wasn’t too hard, was it?! You can make your own homemade no knead bread in about 1 hour, from start to finish. It’s the fastest no knead bread ever.
The flavor is good and it’s the perfect side to a yummy bowl of soup. Or perfect addition to a dinner salad.
Get the printable Recipe…
No Knead Bread in an Hour
Ingredients
Instructions
- Place the flour, yeast, sugar, and salt into the food processor and pulse a few times to mix.
- Mix the water with the oil.
- Slowly add the water mixture through the chute of the food processor with it running.
- Process until the dough forms a ball. Remove the lid and check the dough. If it’s too wet, add a tablespoon or two of flour. Too dry, add a tablespoon or two of water and pulse a few times.
- Remove the dough from the food processor and add to an oiled bowl. Turn the dough a few times to coat the dough with oil.
- Cover the bowl with a towel and let rise 15 minutes in a warm place.
- Heat 2-4 cups of water to almost boiling. While the dough is rising.
- After the dough has risen, cut in half and shape into two balls.
- Place the dough balls on a cookie sheet and score the top of each with a deep X.
- Place the cookie sheet in the oven on the middle rack of a cold oven.
- Place a cake pan on the lowest rack in the oven.
- Add the hot water to the cake pan.
- Close the oven and set to bake at 400 degrees.
- Bake the bread for 40-50 minutes or until golden brown.
- Move bread to a wire rack to cool.
- Enjoy!
Video
Nutrition
If You Like this Recipe
Subscribe and you'll get Recipes
sent right to your inbox!
Click the button below and fill out the form.
Shelly – Your recipes are awesome and the videos are the best I’ve ever seen. Please keep those videos coming with your recipes. You are an exceptional cook.
Thanks April, that is so nice of you to say. You made my day.
What kind of yeast do I use? Active or fast rising. First time baker. Thank you.
Sherry, I use active yeast for this recipe. I hope that helps.
I do not have a processor.. Any other way I can mix it?
Sharon, add the dry ingredients to a bowl but only use half the flour. Add the wet ingredients and stir. Then add a little flour at a time stirring after each addition until the dough balls up. Then you’ll need to knead the dough for about 5-6 minutes might need to add a little more flour as you knead. With a food processor you don’t have to knead but by hand you’ll need to knead the dough. Then just follow the rest to the recipe. I hope that helps.
Question: Can I put the two portions of dough in bread pans instead of on a cookie sheet and get more traditional sandwich-type loaves?
Felicia, I haven’t tried that before, but I don’t see why it wouldn’t work. Let me know if you get it a try.
made the bread today. I think the. crust got too brown. Should I lower the temp?
Linda, did you bake it on the middle rack in the oven? If you did then I’d try lowering the temperature next time or reduce the baking time. Each oven is different so you may have to remove it from the oven before the time is up. I hope that helps.
I made this bread twice and can’t get enough of it. it’s so easy to make, and I love that you do t have to wait 8 hours for it to rise. I’m a spur of the moment baker and I love fresh homemade bread. Thanks Shelly for the easy video and instructions.
Carrie, I’m glad you liked the recipe and it was easy to follow with the video. Happy bread baking!
I put one on a cookie sheet and one in a loaf pan. Both did great!
Linda, thanks for sharing! I’m sure your comment will be helpful to others looking to do the same. I appreciate you taking the time.
THANKS for simplifying this to the point I was not afraid to try it. Bread has been tough for me – failure after failure. You know bread is one of the oldest, if not THE oldest dish in our history. So, why did it give me so much grief????? My bread didn’t look as light or airy as your pic but we could eat it, so I count that as success! I probably could have left it in the processor just a bit longer, added a bit more flour and left it in the oven a little longer. I think I was just a bit excited! Oh, and the aroma! Oh my goodness!
I’m a bread baker now!
Linda, I’m so glad you gave the recipe a try. I try to make all my tutorials as simple as I can, I want everyone to feel like they can make any recipe I share. Congratulations on your loaf of bread. Yes, you are a bread baker for sure.
Thank you so much for your recipe and video! We went into sudden self-isolation and are waiting two days for the next food delivery (no family nearby), we had no bread or crackers left but we did have all the ingredients for this bread in the house. I tried it this morning and rescued lunch for myself, my husband and our three young children. Delicious bread, happy happy family. Thank you!
Helen, I’m so glad you liked the recipe. I hope you and your family stay well!
Thanks! All well in the end 🙂. You too!
Do you think this would work with gluten free flour? We have a egg, dairy & gluten intolerance…
Cindy, I’m not sure I’ve never tried it with gluten free flour. Sorry I couldn’t be of more help.
Can I use gluten free flour for this recipe?
I’ve never tried it, so I’m not sure Kristal. But if you try it could you let me know how it goes. I’ve love to be able to add that information to the article.
If I forget to set up the bread maker 5 hours before dinner (I normally DO forget) this is my go-to recipe to get bread on the dinner table. Delicious! Fast! 2 loaves for the work of one! The recipe is too big for my food processor so I just use my stand mixer—still comes out perfectly!
Jessica, I’m so glad you like the recipe.
Can I use my mixer for this recipe as I have a smaller food processor?
Yes, you can. You’ll want to add a little flour at a time though and if you have a bread hook, I’d use that.
Thank you very much much Shelly. I will definitely make it in my mixer
Rose, you’re welcome, I hope your bread turns out great.
It actually did and I was so pleased. I am definitely going to make my own bread from now on. Thanks a lot Shelly!
Does the cooking time start once the bread goes into the oven? Or once the oven is done heating up to 400? …new bread maker here! Thanks !
Melissa, start the cooking time as soon as the bread goes into the oven. I hope that helps and I’m sorry that wasn’t clear in the recipe. I hope your bread turns out great.
Have you tried this recipe with a whole wheat or spelt flour?
I haven’t tried it with whole wheat flour but I’m sure you could substitute at least half of the white flour with whole wheat.
I’ve made this bread several times..but today I did it a bit different. I always have used my Kitchen Aide Stand Mixer.
#1..I used rapid rise yeast…same amount
#2..Totally forgot it was to start in a cold oven! I had just baked scones and the oven was ready to go…so they went in.
#3.. About 25 mins. Internal temp when I removed was 206*. Crust is wonderful…inside is soft and yummy!
Thanks for sharing how you made this recipe. I’m sure it will be a help to others. I’m glad you liked the recipe.
When I turn on the oven it automatically preheats by using both the lower and the broiler coils. This will burn the top of the bread won’t it? Any suggestions?
Jo, my oven also preheats the same way and I’ve not have problems, hopefully you’ll have the same experience too. Make sure your loaves are positioned in the center of the oven so they are not too close to the top. Let me know how it goes.
I’m a bit of a overachiever so I split the recipe in thirds add add sharp cheddar to 1/3 left the third playing in made the other third in the cinnamon rolls and because every lover bread needs a pot of soup I made some beef barley soup to go with it
Sound delicious Dora!
I love my bread. Crunchy on the outside and soft in the inside.It was easy due to your precise instructions. I now lnow how to change my flour portion. I live in Florida but we are currently in 35° cold weather (for us) so I used the measurements for dry weather not the usual humidity. Looking forward in baking it again.
Jasmine, I’m so glad you loved the bread recipe. Wow, 35 degrees that is cold for Florida.
What type of flour did you use?
April, I use all purpose unbleached flour. I hope that helps.
I Love this bread! This is the easiest and most versatile bread recipe I have ever made. So far I have made it plain, with cranberries and walnuts and with rosemary and thyme. I did make one change though, I mixed it in my kitchen aid instead of a food processor which seemed to small for the first batch but other than that it’s perfect!
Cheryl, I’m so glad you liked the recipe. All of your additions sound wonderful. Thanks for sharing.
i bake bread all the time and when I saw this recipe for 1 hour bread I had to try it.
The bread turned out perfect. We enjoyed it with Tuscan Soup. I was going to send picture but my 2 boys devoured them.
Have enough to make boys grill cheese tomorrow and then going to make more. Thanks you so much!
You’re welcome, I’m glad you liked the recipe.
Dear Shelly,
Do I line the pans with parchment paper or place dough on pans alone.
Thank You,,
Rosemarie
Rose, I just place the dough on the pan. I hope that help.
Can I make have the recipe to make only one loaf? Have you tried that?
Yes, you can cut the ingredients in half to make just one loaf instead of two. I hope that helps.
Could you make one large loaf? If, so, should I increase the time for baking and rising time as well?
Debbie, I’ve not tried that before, so I can’t say how it would work. Maybe if you made the loaf elongated and increase the baking and rising time? I haven’t tried it before though. Sorry I couldn’t be of more help.
This recipe is AMAZING! I don’t have a food processor so I used a bowl and a large metal salad fork to make the dough (worked perfectly)! Such a beautiful Artisan Bread, soft on the inside and crusty on the outside! My husband used a couple slices for a sandwich this afternoon and loved it 🙂 Do you have any storage tips besides a plastic bread bag?
Peggy, I’m so glad you loved the recipe. As far as storage goes. Plastic zipper topped bags work the best to keep the bread from drying out. You’ll want to make sure it fully cooled before placing in the bag. The only drawback is the bread’s crust won’t be as crisp. If you don’t want to use plastic, you can use foil to wrap the bread. But again the bread’s crust won’t be as crisp but the bread won’t dry out like if you stored it in a cloth bag. If you are storing the bread for only a few days, you can try a paper bag and place it in a bread box or the cupboard to keep the air flow off of it. The crust will stay more crisp but the bread may start to dry out over a few days. I hope these suggestions help.
Love this recipe
So quick and still just as delicious.
Debbie, Glad you liked the recipe.
I don’t have a food processor so I just mixed it in my Kitchenaid mixer. Followed it exact otherwise, but put them in loaf pans instead of round loaves on cooking sheet. Wish I could post pictures. Loaves turned out great.
Michelle, thanks for sharing that the bread baked up well in loaf pans too. I’m sure that tip will be helpful for other readers. I appreciate you taking the time to post it.
This recipe was So easy and AMAZING!! I Love the smell and taste of hot fresh bread. there is nothing like it. Just follow these instructions and everyone in your house will come running! Also, the timing if 40-50 minutes is from a cold oven to finished baking time. Definitely a keeper recipe!! ❤️
Carrie, so glad you like the recipe. Thanks for letting me know. I appreciate it.
Hi, my bread is rising, was wondering if you coat your bread with anything b4 you bake, ie: oil or egg, or milk?
THX Colleen
Colleen, I don’t coat mine at all but you could if you’d like.
I love this recipe!! I added a little bit more flour than called for. Then added some shape cheddar and freshly roasted garlic. Folded that in let it rise again and BAM. Best bread ever!!!
Those addition sound wonderful, thanks for sharing them.
What are the measurements of yeast etc?
Judy, they are in the recipe card at the end of the blog post. I hope that helps.
Shelly, This recipe is wonderful! I love that your directions are so easy to follow, and especially that you have a video tutorial. a video always makes it so much easier for getting all of the steps correct. I halved the recipe and made just one loaf and it came out amazing! We love fresh baked bread and I have made this bread 3 times, each time better than the last. I wish there was a way to attach my pictures to show how perfect it was. Thank you!
Carrie, this makes me so happy that the recipe was easy for you to follow. If you’re on Instagram you can tag me @frugalgirl to share photos with me I’d love to see them.
I as wondering if I could make this into crusted inner rolls. Any hints in trying it?
Deb, You could follow the recipe but make small balls instead of two big loaves. The watch them as they cook, as they won’t take as long to bake. That might work but I haven’t tried it before. I also have a quick dinner roll recipe you can find it here. Let me know how it goes if you give this recipe a try as dinner rolls. I’d love to hear how it turns out for you.
I tried this recipe with gluten free flour and it came out great. The baking time is longer, but overall it worked. I’m new to GF bread baking and there are probably things I can add or change, but for the first try I am super happy.
Donna, thanks for letting me know this recipes works with gluten free flour. I’m sure your comment here will helps other looks for gluten free recipes that work. Thanks again.
Thanks for a great bread recipe! I don’t have a food processor so used my stand mixer which worked just fine. Will definitely be making this on a regular basis. Liked your tip to add the warm water in the pan on the lower rack. This made a good crust and soft interior.
What do I need to do if no food processor?
You can mix by hand instead of using the food processor or use a stand mixer. I hope that helps.